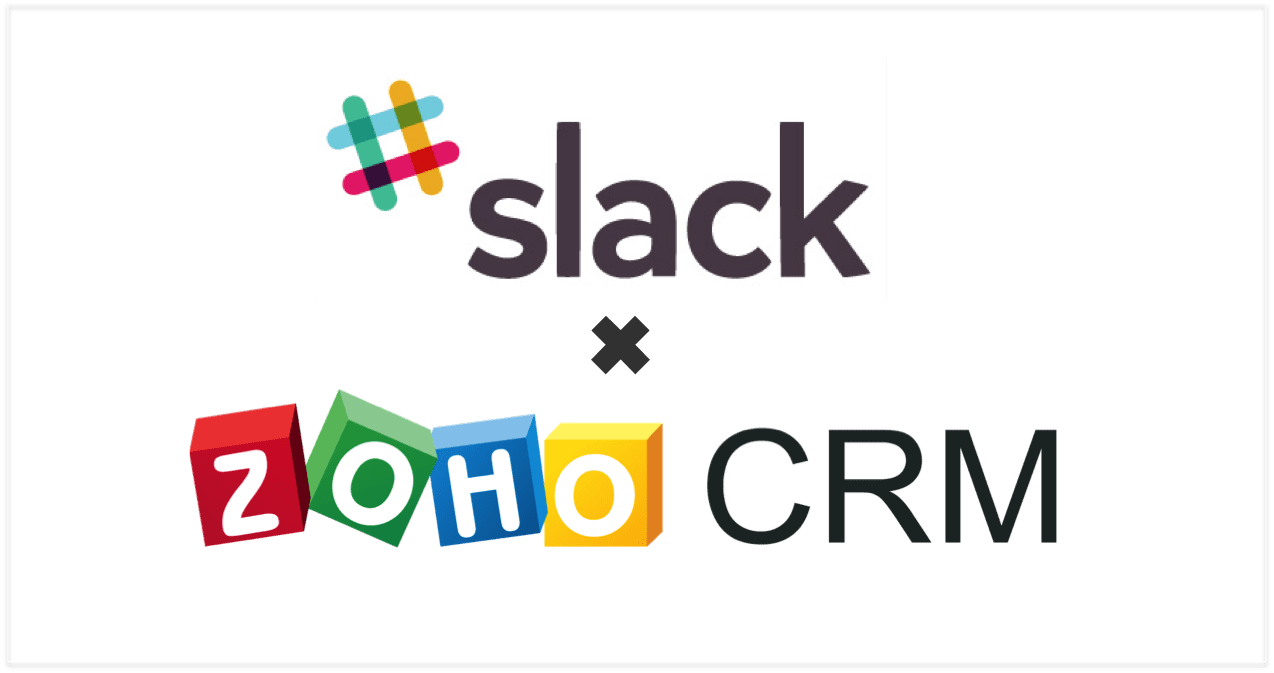
Need Zoho information or help due to COVID-19? Let us know.

Search results for : zoho app

Zoho CRM Blueprint – The Blueprint to Sales Success

Zoho CRM Blueprint – The Blueprint to Sales Success

Hello, everyone!  This is the second post in a series on the latest new offerings in the realm of Zoho CRM.  Zoho has chosen to focus heavily on sales automation for this round of upgrades, and with good reason: as CRM is the most expensive and arguably most important Zoho offering, Zoho wants to ensure you get the most bang for your buck.  These new offerings are only available with Zoho CRM Enterprise (and now Zoho One), so the powers that be really want to entice you to use that version of the software.  And, for good reason – it’s already the best version of the system.  So, without further ado, let’s talk Zoho CRM Blueprint.

(You can find the first post of the series on Zia, the AI-powered sales tool, right here.)

I say Blueprint, you say…

When someone mentions a blueprint to you, what’s the first thing that comes to mind?

Probably a plan to build a house or other structure, but it isn’t a full rendering.  Really more like a cross section showing all the walls, windows, and beyond… The guts of the edifice, where the wires and pipes go, the lighting fixtures – everything.

And so it is with your sales cycle, in a manner of speaking.  Even if you don’t see everything at once.

See, sometimes your salespeople need a blueprint to get from A to B.  Obviously they know how to sell, but, especially in today’s technology-driven work environment, outside stimuli are everywhere.  And, it can be easy to get distracted and lose focus.

So, wouldn’t it be nice if your salespeople had a blueprint, a sort of road map to get where they need to go, in terms of sales?

Obviously this is all a little abstract, but I’m hoping you’re with me so far!  This is Zoho CRM Blueprint:

zoho crm blueprint

What we essentially have here is a literal blueprint to success for your sales team.  This document has a few different color-coded blocks: White rectangles correspond to stages in the Deals module, while the gold parallelograms correspond to potential actions your salespeople can take in relation to those stages.

Now, ordinarily, your sales staff might have deal stages in front of them and just be expected to follow up with clients on a schedule, moving the deals stages accordingly when appropriate.  But, that isn’t always enough to ensure success, as general instructions aren’t always clear.  Even if you or your Zoho consultant of choice have set up workflow rules for your sales staff to let them know what tasks they need to carry out in relation to a deal, salespeople still have to access the task and click “complete.”  Zoho CRM Blueprint takes this routine a step further, making it possible to complete tasks directly from the Deal screen and giving those tasks a wider context from which salespeople can view them and understand exactly where they are in the sales cycle.

Zoho CRM blueprint allows for setting simple instructions, as the illustration above shows: Start.  Schedule Appointment.  Qualify.  And so on.  Like a Zoho training session, but better.

Drawing up your Zoho CRM Blueprint

Unlike conventional blueprints, using Zoho CRM blueprint doesn’t require the use of drafting programs to really nail down – in fact, you don’t even really need a steady hand.  It really is as easy as creating deal stages, creating per-deal tasks for salespeople (called “transitions”), connecting the dots, and doing a little drag-and-drop.  Observe:

zoho crm blueprint

You can give conditions to Zoho CRM Blueprint transitions, too.

Part of drawing up your sales process involves setting parameters, and of course you’ll want to make sure everyone is on the same page.  You can use these parameters to ensure that, for example, contracts are closed within a certain window of time, or that your sales staff doesn’t go crazy with giving out discounts.  When your sales team goes to complete a transition, they’ll see an additional dialog box if you choose to add one asking for some details:

zoho crm blueprint

Not only does this keep your sales team in line with your company vision, but it gives you even more data with which to build reports and gauge the health of your company.  For example, with the data collected from this dialog box to the right, you’ll be able to determine the average discount rate given by all sales team members, the average discount given by salesperson, and of course the amount of time taken to close a deal by salesperson and on the whole, if you aren’t already collecting that data elsewhere.

Thankfully, Zoho CRM anticipates this is just what you’ll be doing and created a screen just for drilling down into this data.  Kinda makes me want to go in and start playing with it right now… Either that or make some sales; I haven’t quite decided yet.

zoho crm blueprint

How do these Blueprints fit into Zoho’s ultimate vision for the CRM?

Again, Zoho’s game as of late seems to be taking the sales process and automating as much of it as humanly possible, so after implementation you hardly have to touch it at all.  After all, why spend any time thinking of what to do to improve sales processes if a machine can analyze your behavior and tell you exactly what works and what doesn’t?  Why fret over which tasks to complete in what order if you can have the Zoho CRM blueprint right in front of you?  Of course, Zoho recognizes that less time spent thinking means more time spent doing actual work, and since, barring your deftly-worded phone conversations, sales procedures themselves don’t tend to be all that individualized – that is, they tend to fit right onto a blueprint.

Look!  Blueprint is now a component of Zoho Desk, too

zoho desk blueprint

Zoho has added blueprint functionality to Zoho Desk, which means you can give your support agents the same daily structure you give to your sales team.  It also means you get all the same reports for your help desk that you do for your sales team, from time spent per transition to time spent on each blueprint itself.  And that, in turn, lets you analyze your weak points and work to eliminate bottlenecks in your process.

Hungry for more?

Well, that makes at least two of us.  I can’t wait to see what else Zoho has in store in terms of sales automation.  The very prospect is a little mind-boggling: someone had to design the sales process itself, but once it’s committed to the blueprint and you have a dedicated staff to carry it out, it arguably runs itself.

Stay tuned for more updates like these, and let me know if you have any questions by clicking the link below this post!


DIY Zoho QuickBooks Desktop Setup & Documentation

Thanks for using our DIY Zoho CRM & QuickBooks Desktop integration

diy zoho quickbooks

This application is designed to sync information in Zoho CRM to QuickBooks Desktop, or the other way around.  Some information can only be synced one way, and some of it can be synced both ways, depending on your need.  The integration grabs the data you can sync from the available fields either in QuickBooks Desktop or Zoho CRM.

The integration is designed only to sync new and updated records across platforms, not all records, although if you use an annual payment plan (for premium versions of the integration), you’ll be able to sync any records across platforms based on dates as far back as you’d like.  Please see section 4: Settings for more on data migration.

The first thing you’ll want to do is log into the application using the URL here.  You may want to bookmark it for your convenience.  The login page will require the credentials you created on the intake form.  If you aren’t sure what the intake form is and you don’t have login credentials, you’ll want to read this page on completing the QBO integration intake form before continuing.

Please see the following table of contents for instructions on how to use each aspect of the integration dashboard and the integration itself.

Table of Contents

  1. QuickBooks Mapping
  2. Logs
  3. Filters
  4. Settings
  5. Upgrade Plan
  6. Other Options
  7. Using the Integration
  8. A Few Provisos
  9. FAQ

Before you start using the application, this is a tour of all the modules on the left-hand navigation bar.

1. QuickBooks Mapping

This is the default or home page you’ll see upon logging into the ZBrains dashboard.  This screen allows for the mapping of different QuickBooks fields (on the left-hand side, marked by QB icons) with corresponding Zoho fields (on the right, marked with Zoho icons).  Standard QuickBooks fields will be marked with green QB icons while custom QuickBook fields will be marked with similar red icons.  Zoho fields will be marked with a regular Zoho icon regardless of whether the fields you choose are standard or custom.

The mapping works by selecting a Zoho field to map to each of the listed QuickBooks fields.  By default, for all available modules, the integration will map some of the QuickBooks fields to Zoho fields.  These mappings may not be to your liking, so please confirm they are correct before continuing.

To map a QuickBooks field to an unoccupied Zoho field: Click on the text field beside the field you’d like to map.  A dropdown menu will appear, from which you can select any field you’d like.  You can also type the name of the field you’d like if you already know its name, and the dashboard’s autocomplete feature will leave only field names that contain a match for the string you’ve typed.  When you see the name of the Zoho field you’d like to map to the corresponding QuickBooks field, select that field by clicking it.  Click “Submit” to save any changes.

If a field is occupied and you’d like to delete the mapping: Click the small X to the left of the field name or to the left of the field itself, then repeat the mapping process for an unoccupied field outlined above.

The following buttons are available in every module, regardless of the version you use:

  • Sync Mappable Fields button: This will grab all usable fields both from QuickBooks and from Zoho.  This is useful when you’ve just added a custom field to either QuickBooks or Zoho and you’d like to map it.  This also works if you simply don’t see a field in either QuickBooks or Zoho that you know already exists.
  • Reset Default Mapping button: If you don’t like how you’ve mapped the fields in your dashboard and you feel it would take too long to simply change them all back, you can use this button to return the mapped fields to how they looked when you first signed up for the integration.  Some fields will already be mapped.
  • Reset button:  This button is at the bottom of the screen.  Use this to clear any changes you’ve made before hitting Submit.  If you’ve already clicked Submit and changed your mapping details, you’ll have to manually make the changes you want and then click Submit again.
  • Submit button: This button, also at the bottom of the screen, saves any changes you’ve made on your mapping screen.

Also available is the Static Field checkbox beside every mappable field.  Checking this box will delete the Zoho field mapping option from the associated QuickBooks field and allow for hard-coding a value into the QuickBooks field instead.  Naturally, this means you can only assign a hard value to a QuickBooks field, not a Zoho field, so this feature is useful for Zoho-to-QuickBooks syncs.  Possible use case: If every customer tracked in QuickBooks Online is on the same payment terms, you may choose to mark all payment terms a certain way for customers synced from Zoho to QuickBooks, e.g., “Net 30.”

2. Logs

You’ll be able to track which records the integration has interacted with by examining the Logs page.  Different log screens are available for each available module, although the screen will default to Accounts if you don’t select an individual module page from the drop-down menu that appears after clicking.

When the integration interacts with a record, regardless of whether or not that record has been synced, the record will appear in the log.  Newer synced records appear at the top of the log while older synced records are pushed to the bottom.

Following is an explanation of the items in the log table itself:

  • Module Key: The number that appears here corresponds to a record in Zoho CRM.  You can view details for this record by clicking the blue Info button to the right of the record.
    • To view the corresponding record directly in the CRM, highlight and copy (CTRL+C) the number displayed under the Module Key heading, navigate to Zoho CRM, find the appropriate module, and view any available record in the module.  At the end of the URL for that record will be a long string of numbers, similar to the module key displayed in the sync log.  Delete the number currently at the end of the URL and replace it by pasting (CTRL+V) the module key number you’ve just copied.  Press enter and your browser will navigate to that record.  This functionality serves to give the user a direct view of the record in case any changes to the record are necessary.
  • Status: This tells whether or not a record was synced by the system.  Possible options here are Synced, Error, Not Synced, or Not ValidSynced means the record was synced across platforms.  Both Error and Not Synced mean the record was not synced because of an error.  Not Valid means the record was not synced because of user-defined filters.  Filters are further explained in section 3.
  • Error Message: This column displays the message associated with a sync error, if applicable.  Errors are usually related to a problem with Zoho CRM accepting the info, not with QuickBooks.  If you ever come across an error you do not understand, we offer support for any premium plan (that is, any plan that is not Freemium).  Please contact us if you need help.
  • Last Sync Date: This shows the date and timestamp of each record in the sync log.  You can use this to determine whether or not your integration is syncing by comparing the last sync date to the current date and time.
  • Details: This column shows a blue Info button for each record synced.  Clicking this button will open a new screen within your browser window that shows all fields the integration has come in contact with.  This is useful for giving an at-a-glance look at the record in question; alternatively, you can examine the record exactly as it appears in Zoho by using the record’s module key.  (Please see the bulleted instruction with the Module Key item above.)

3. Filters

By default, the integration will sync any new or modified records across platforms depending on the sync direction you select.  If you do not want all new or modified records to sync, you can choose to set criteria the integration will apply to all records it attempts to sync.  Clicking the Filters module on the left-hand navigation bar will bring you to the Accounts filtering screen, but you can set filters for any available module.

  • The default filter screen will be for records synced from Zoho to QuickBooks, but you can set the same (or a different) filter for records synced from QuickBooks to Zoho if necessary.  You can access the different sync directions with the drop-down menu in the upper right portion of the screen.

Here are the main options available to you in the Filter module:

  • Select Field: This drop-down menu displays a list of fields available inside the corresponding module in Zoho CRM or QuickBooks, depending on which module’s page you access.  Selecting a field here tells the integration which field the filter will act upon.
  • Select Condition: This menu displays a list of basic conditions to apply to the field chosen in Select Field.
  • Value: This is a text field you can use to type any information you want the integration to act upon based on your selected field and condition.  If your selected condition doesn’t require a value (e.g., “is not empty” or “is empty”), you should leave the Value field blank.

Use the blue plus symbol (+) to add another record filter in a given module and sync direction.

Use the green Submit button to save and apply any filter you have set.  Click the red Reset button to clear any unsaved filter.  And, use the dark blue Remove All Filters button to remove all filters you have set for the current module and sync direction.

4. Settings

The settings menu is comprised of a few tabs.  Their uses and purposes are enumerated here:

Zoho Authtoken: This field contains the Zoho authentication token used when you filled out the integration intake form.  The authentication token allows the integration to connect to your Zoho CRM instance, so if you remove it the integration will not work.  If you need to switch authentication tokens for any reason, please replace a deleted token with a new one as quickly as possible to avoid any sync interruptions.

Sync Direction: This tab lists the available module pairs to sync, according to which version of the integration you’re using.  You can use the drop-down menu to the right of each module pair to select whether you’d like to sync records in those modules from Zoho to QuickBooks, from QuickBooks to Zoho, both ways (Bi-Directional), or not at all (Disable).

  • Please note: Selecting “Disable” for any module pair will make the field mapping section for that module invisible, so you won’t be able to make any changes until the sync is re-enabled.  As well, we do not advise disabling the sync for essential (Accounts/Customers or Products/Items) modules unless you are working with the Freemium version of the integration, as failure to sync those properly can potentially cause syncing of transactional records to fail.

Sync Historical Data [Annual customers only]: This tab lists the available modules from which to sync old records.  In this case, an old record is anything created before the integration was implemented, as the integration is designed only to sync new or modified records; in cases where many records are present in one system and manually updating them all in order to trigger the integration’s sync would prove too time consuming, migrating historical data makes sense.

  • The Module Names heading lists the modules available to sync data from.  Sync Date allows for choosing a historical date from which to sync data.  The date can be modified across modules.  Use the check boxes to the right of each module to confirm you wish to migrate data from that module across platforms, and click the Submit button to begin.  The Reset button is not used.
    • Please note: The sync directions for the Sync Historical Data tab are controlled by the sync directions set in the Sync Direction tab.  If the proper module names do not appear on this screen (e.g., you see Customers, a QuickBooks module, instead of Accounts, a Zoho module), please change your preferred sync directions on the Sync Direction tab and the modules displayed will change accordingly on the Sync Historical Data tab.

Once your historical data migration tab is activated, you may use the function as often as you’d like.

5. Upgrade Plan

Clicking this module in the navigation bar will display your current integration plan juxtaposed with other available plans.  You may upgrade or downgrade from one plan to another at any time without any lapse in functionality.  When any plan is upgraded or downgraded, you will receive two emails: One confirming the cancellation of your current plan, and another confirming the beginning of a new service subscription.  All upgraded or downgraded plans will come with new 15-day free trials, except for Freemium, which is always free to use.  Please note: Your monthly service fee will not be prorated when your new subscription begins.

  1. If you choose to upgrade to a paid plan from a Freemium plan, you will be prompted to enter your payment information.  Once the system accepts this information, you will arrive back at the “Upgrade Plan” page and will have the option to map fields in new or different transactional modules by clicking the QuickBooks Mapping module in the navigation bar.
  2. If you upgrade from one paid plan to another paid plan, or if you downgrade your plan, you will not be prompted to re-enter payment information.

6. Other Options

Clicking your username in the upper right corner of the screen reveals several other options:

QuickBooks Online: This is a general settings area for establishing the connection between the integration and your QuickBooks Online system.  In most cases, you will not need to access the screen again after establishing the connection for the first time.  The screen lists three steps to configuring the integration:

  1. Authenticate:  This step is completed in the initial intake form after you click the light blue Authenticate QBO button in Step 2 of the intake form.  The background area of this step should be filled in with dark green, indicating the step has been completed.  You do not need to do anything else with this step.
  2. Verify: This is an extra step to ensure the connection between QuickBooks Online and our integration platform.  If the background area of this step is not filled in with dark green as in the Authenticate step, please click Verify and follow the prompts you receive.  Once this step is complete, the background area will turn green as it does with Authenticate.
  3. Activate: After completing steps 1 and 2, the integration still will not function until you toggle the switch from “Inactive” to “Active.”  The “Inactive” toggle will show a switch with a grey background, while the “Active” toggle will show a switch with a dark green background, similar to that used in steps 1 and 2.  You can use this “Inactive” toggle to quickly turn the entire integration off, and the “Active” switch to turn it back on again.

Help: This link leads to the ZBrains help desk.  Use this link to submit a ticket if you have a general question about setup, or you experience an error that is not covered in this document.

Logout: Clicking this link will log you out of the integration environment.  The system will automatically log users out after 10 minutes of inactivity, so we advise you to either keep your password handy or have your browser save it for you.

7. Using the Integration

After familiarizing yourself with the various components of the integration dashboard, you should run a sync with some test records to confirm the functionality of the integration.  To do this, please follow these steps:

  1. Re-confirm your field mappings (see section 1) and your sync direction.
  2. Open your platform of origin, either QuickBooks Online or Zoho CRM, and create a test Customer (in QuickBooks) or Account (in Zoho), making sure to include data in mapped fields.  The sync will run automatically every 10-15 minutes, so please wait and confirm your test record has appeared in the destination platform after enough time has passed.  Use the Logs module in your navigation bar to check on synced records.
    • Please note: Users are unable to modify the sync interval currently, but this feature will probably be included in the next release.
  3. Open your platform of origin again, and create a test Item (in QuickBooks Online) or Product (in Zoho CRM), making sure to include data in mapped fields.  Again, wait until enough time has passed for the sync to occur.  Use your Logs module to check on synced records.
    • Please note: Once you have confirmed your Products or Items sync correctly, you may create a test transactional record as your service plan allows, but please ensure products or items used as transactional line items are synced to both systems before using them in transactional records.  If these line items are not synced across platforms before creating a transactional record to sync, the transactional record you create will not sync.

Once you have confirmed the integration functions to your liking, there’s nothing else to do: the integration will continue to run at 10-15 minute intervals, syncing any records you input across platforms as you specify in your sync direction settings.

8. A Few Provisos

There are some things you should know about the integration that aren’t obvious from the onset:

  1. The integration creates hidden custom fields in QuickBooks. When you implement this integration, all QuickBooks Customer and Item records will gain a new custom field called ZOHOMODULEIDCUSTOMER and ZOHOMODULEIDPRODUCT, respectively.  These will be filled with values the integration uses to track sync states, and they are not mappable in the interface.  For that reason, please do not modify the values in these custom fields, as doing so will cause certain records not to sync.
  2. The integration only works with “Inventory” items in QuickBooks.  Whenever you sync items from Zoho CRM to QuickBooks Online, they will arrive in your system as inventory items (as opposed to other types).  Conversely, only inventory items (as opposed to other types) are allowed to sync from QuickBooks Online to Zoho CRM; other types of items will not sync.  For this reason, we advise you not to change inventory item types manually after they sync to your QuickBooks Online, as they will not be updated back to Zoho CRM and, as a consequence, could cause certain other transactional records not to sync.
  3. For bi-directional syncs, if a given record is modified in both Zoho CRM and QuickBooks Online between syncs, the record in QuickBooks Online will take precedence.  In these cases, changes made to the records in Zoho CRM in this manner will be lost.  We advise against modifying a given record in two different systems as a rule for this reason.
  4. QuickBooks requires some Item fields; Zoho does not require the same information in Products.  QuickBooks requires items to be mapped to expense accounts, income accounts, and asset accounts; Zoho CRM does not store this information, though.  For this reason, you do not need to have these fields filled in Inventory Settings if you only plan to sync from QuickBooks to Zoho, but you will need to ensure they are correctly mapped if syncing from Zoho CRM to QuickBooks.
  5. All Accounts/Customers and Products/Items should be synced across platforms before syncing non-test transactional records.  This is because introducing a new Zoho account or QuickBooks customer – or Zoho product or QuickBooks item – at the same time as a new transactional record like an invoice, sales order, or quote/estimate, will cause the integration to fail.  You may choose to keep accounts/customers and products/items inconsistent expressly to test the functionality of a transactional sync – for example, an invoice – by creating a test QuickBooks customer, test item, and then a test invoice containing that item and associated with that customer, but this practice is not advisable beyond testing.  Please note: Data Migrations are required for all Integration projects and pricing varies on complexity of the integration itself. Typically, data migrations are priced based on the number of modules (ex.  Sales Orders, Invoices, Customers are examples of modules) along with the number of records. Schedule an integration assessment today with a ZBrains consultant to get a project quote. Use the Connect with Us button at the end of the article.
  6. Deleting a given record previously synced across platforms will cause the sync to fail if the non-deleted record is modified and needs to sync again.  This is related to point 1, as the integration will search for a matching ID field that corresponds to a record already created, as the field does not exist for new records.  When the integration does not find a matching ID field, the record will not sync.  For this reason, we advise against deleting any records that have been touched by the integration unless you either plan to delete the corresponding record from the other platform or do not plan to modify the non-deleted record any further.

9. Frequently Asked Questions

Thankfully (or perhaps not), some issues with the integration are more common than others:

  1. Why aren’t any of my fields appearing in the QuickBooks Mapping module when I log in for the first time?
    • Sometimes, the integration needs a little positive reinforcement.  If no mappable fields appear, first click “Reset Default Mapping.”  If this does not cause your fields to appear, click “Sync All Mappable Fields.”  If neither of these options work, please open a ticket with us here.
  2. I just followed your instructions, but only some of my QuickBooks fields are appearing.  What gives?
    • The integration grabs fields from QuickBooks by looking at the fields that are being used by other records in your system.  If you’re looking to map a field in QuickBooks that you’ve never used before, try creating a test record that utilizes those fields you don’t see yet, then click “Sync All Mappable Fields.”  If this doesn’t solve the problem, please let us know about it.
  3. I logged in for the first time and my Customers/Accounts fields appear, but none of my Products/Items are there.  What happened?
    • Are you on the free version of Zoho CRM?  That one doesn’t have a Products module in it, so you won’t see any inventory fields that way.  To solve that problem, please upgrade to a free trial of at least Professional edition and refresh your integration dashboard.
  4. Upon setup, I got a red error flag saying “At least one inventory item must be present.”  What do I do?
    • This is somewhat related to question 2 above.  To solve this problem, please create a test inventory item and return to your QuickBooks Mapping module, select Products, and click “Reset Default Mapping,” then “Sync All Mappable Fields” if no fields appear.  If you still see the red error flag, open a ticket with us.
  5. What does Static Field mean in my QuickBooks Mapping module?  How do I use it?
    • The Static Field option is used to assign a hard value to any QuickBooks field, but not to sync that value anywhere in Zoho.  For more details on this feature, see the bottom of section 1: Mapping.
  6. I got a big red error flag saying my QuickBooks Online credentials are no longer valid so the integration won’t work.  How do I get it to work again?
    • This means someone (maybe even you) must have changed your QuickBooks Online credentials without realizing that would affect the integration.  Don’t worry; it happens to the best of us.  To re-authenticate the integration, go through the QuickBooks Online steps in section 6: Other Options.
  7. Some of my records are merged – or, they’ve been deleted!  Did the integration do it?
    • It wasn’t us!  The QuickBooks Online API doesn’t allow for merging records or deleting them automatically, so we couldn’t have even done it if we tried.  If you’re running plugins other than the Zoho CRM & QuickBooks Online integration, one of those may the culprit, as the issue may have to do with a program other than QuickBooks or Zoho.

Thank you again for using the QuickBooks Online integration with Zoho CRM.  Please let us know if you have any questions or experience any issues this guide does not cover by calling (888) 207-4111 or using this link to our help center.

Connect with Us

Zoho’s Zia: AI-Powered Assistant for CRM Sales

Howdy, you zany, tech-minded readers.  This blog’s been a little quiet lately… and, rather than bore you with my very personal story of wearing 19 different hats, solving global hunger, and curing cancer, I figure I should just get down to business and tell you about some new Zoho offerings, as that is what I seem to do best.  So, without further ado, let’s talk about Zoho’s newest addition to the CRM: Zia.

Zoho CRM is getting even better

zoho crm zia

Zoho has, in fact, been just as busy developing new product extensions as we’ve been over here helping Zoho users.  Their last big CRM update was almost a year ago, in June 2016, when they came out with the new UI, so I suppose they were due for an update.  (Zoho doesn’t seem to be able to fathom letting most apps stagnate for more than a year.)  This round of new additions certainly did not disappoint.  This blog post will cover one of those updates, while some of the next blog posts I write will cover the others.

So, this Zia.  What is it, exactly, and why is it here?

Zia: Like having a business coach right at your desk

zoho crm zia

Zia is a nifty little widget that sits right in the lower right corner of your CRM (if you’re using Enterprise edition, that is) and gathers information about how you use the CRM.  That’s everything from how many tasks you complete (and their types) and which records you interact with, to what emails and templates you’re sending out to your prospects and clients.  Zoho’s AI tool then delivers predictions about how well you’re going to be doing, sales-wise, not only to individual users, but to team leaders as well.

Zia also points out anomalies with special Zoho CRM screens

One important part of forecasting sales is pinpointing aberrations in your trends and finding out just why they occur.  Zia can hopefully help you prevent these weird glitches entirely with the helpful tips, but, if she doesn’t (yes, it’s a she – Zoho told me so), she provides extra screens with charts to help you visualize sales trends versus actual figures.  Pretty neat.

zoho crm zia

But, where else can we find Zia inside Zoho CRM?

Zia isn’t limited to just a few screens and a lower-right widget.  Truth be told, you can find her in every lead or contact you’ve reached out to in the form of SalesSignals, a real-time recommendation as to the best time to call someone.

[caption id="attachment_2411" align="alignleft" width="168"]zoho crm zia Hm, looks like I missed my mark today.[/caption]

And furthermore, Zia will even politely interrupt you after seeing you’ve performed a particularly rudimentary task over and over again, asking if you want to create a macro that simply does that task for you.

So, if it isn’t abundantly clear why you should use Zia, this is the gist:

  1. Zia sees where you’re spending time doing tasks and helps to automate them.
  2. She sees when you’re contacting people, when you’re having the most success, then generates suggestions about how to duplicate that success.
  3. Zia notices anomalies in your forecasting and offers suggestions about how to rectify those before they become realities.

Basically, it’s like having a coach right there at your desk to help you use the CRM.  Not a bad deal, as the price of Enterprise hasn’t gone up…but, you might just want to upgrade to that version if you aren’t on it yet!

Still need some help with Zoho CRM?

Did you just upgrade to Enterprise edition and get confused by the array of new features, including Zia or Blueprint?  Or, are you a new Zoho user looking for some expert Zoho consulting?  Just contact us using the button below this blog post and we’ll get back to you ASAP.

Cheers,

Jeremy

3 Benefits of Integrating Zoho and QuickBooks for Optimal Financial Control

DIY Zoho QuickBooks Integration Gives You Control

If you’re any sort of follower of this site, you already know that we provide an integration between Zoho CRM and QuickBooks – for both Desktop and Online versions of QuickBooks.

quickbooks zoho integration

However, you may not have known that our new version of the integration is totally do-it-yourself and gives you a host of great new options for managing your data.  Whereas before you’d have to consult with our engineers whenever you needed to change a field mapping or make any sort of tweak to your settings, our new dashboard makes it easier than ever to sync, filter, and back-fill your data.

#1. Customized field mapping for your company

quickbooks zoho integration

If you’ve implemented Zoho CRM you probably know a thing or two about CRM customization – namely, that it has to be done for your business to run effectively.  That said, it probably doesn’t make much sense for you to even attempt to map your data from your CRM to QuickBooks, or vice-versa, using a predetermined mapping scheme.  Our DIY dashboard gives you the ability to set field mapping across platforms yourself, even to custom fields.


#2. Record filtering so you only sync what you need

quickbooks zoho integration

Your company might have criteria in place to transfer records from one system to another so your systems don’t get bogged down with unnecessary information.  For example, maybe you only want to transfer a Zoho account record to QuickBooks if that account has an email address present.  Well, just because you’re moving to a new syncing system doesn’t mean you should have to lose that criteria!  With our record filtering module, you can set criteria by which records can sync – as many criteria as you want, and for any of the modules you have available to you.

#3. Migrate your historical data so your systems match

quickbooks zoho integration

When you’re moving from an old system to a new one, it can be a real pain to back-fill all your old data so your systems are communicating with each other effectively.  If you simply don’t have the time to spend babysitting a data migration, why not let our data migration tool do the job for you?  For migrating data from an old system to a fresh, new one, nothing works better: just select your historical sync dates by module and hit Submit.

If you already have some data on your new system, the historical data sync will still work; you’ll just have to make sure the names of your accounts, products, invoices, etc., are consistent across platforms, as the integration uses the name of any record as the key field.  For more info on that, you can contact us and we’ll give you the scoop.

Total business control at your fingertips

With the various market niches that businesses can fill, it happens that no two are alike… And, so it goes with both your CRM platform and your data syncing needs.  Choose a system that allows for deep customization – Zoho CRM – and choose an integration with QuickBooks Desktop or Online that allows for complete customization of your syncing needs.  Have any integration questions?  Contact us at (888) 207-4111.

Zoho CRM for Project-Based Businesses

zoho crm project based business

Project-Based Businesses have a great potential tool in Zoho CRM

If you run a business that’s based on completing any sort of project, you know how hard it can be just to get everyone on the same page to do their jobs at the right times – let alone find a system that can house all that information and make it easier for your key employees to navigate.

Some companies give up and resort to using Google Drive, Docs, or another cloud-based sharing system.  That way of doing things works – very much the same way a car with no dashboard works, but might be unsafe to drive.  Unless the proper employees enter a boatload of data manually, you’re at a disadvantage by using the shared spreadsheet.  And, not to mention your analytics: you’d have to create all your reports from scratch.  If that dashboard-less car were to overheat because you didn’t know the engine temperature, it would be a totally preventable accident.

[caption id="attachment_2373" align="alignleft" width="300"]zoho crm project based business Does the inside of your computer look kinda like this?[/caption]

Fortunately, Zoho has designed their CRM and related apps to function  perfectly well in a project-based environment, so you can finally ditch your spreadsheets and use a system that’s flexible enough to let you lay down your process, assign tasks to staff members, update old CRM records with new information from other sources, and, of course, give you the peace of mind that comes with having a system that you know is helping streamline your business processes.

What if I like using a spreadsheet?  The problems aren’t so bad!

If you’re an old-school business owner – that is, you were using a pencil and paper before the advent of the first spreadsheet – you might think you’re just fine keeping your current system in place.  And, for a small enough business, you could very well be just fine.  But, if you’ve expanded a bit, you may be starting to see the cracks, much as you try to ignore them.

zoho crm project based business

Here are some problems you might come across if you aren’t using a CRM suited for project-based businesses:

#1. Tracking the status of a project is a chore

Changing the status of a project seems like such a simple task, but imagine if you used a spreadsheet and someone completed their job but forgot to update the project to show their work had been completed.  Would the project grind to a halt until someone noticed the error?  Would the project go on, perhaps without all the necessary information in place, only to be stopped when the client realized something was amiss, or that not enough money was collected for the work done?

These problems aren’t worth having just to retain a legacy system.  By using Zoho CRM instead of a simple spreadsheet, you harness the power of not only required data fields – that is, pieces of information that you can make mandatory in order to move on to a next step in your process – but workflow automation.  Workflow automation is a special tool you can use to automate a number of steps in your overall business process, but in this case, you’d use it to remind your staff to complete pieces of information in your CRM records in order to move on with a project.  Whether it’s following up with an old lead or remembering to complete certain tasks in your system, workflow automation can remind your staff to do it, or even do the work itself automatically.

zoho crm project based business

#2. There’s no way to generate proposals…

One thing you may have noticed during your time using a spreadsheet is that it isn’t very conducive to writing proposals.  Sure, you can manually copy data from a spreadsheet into a separate piece of proposal software, but how much time would you save by having all the information populate in your proposal tool automatically?

#3. Keeping track of project payments is painful!

If you aren’t using some sort of software to keep track of incoming payments, you (or your accountant) will have a load of unnecessary work to do most every day.  And, even if you use a CRM and an ERP system to track payments, you’re still at a disadvantage unless you have a way to integrate the two.  Integration of two disparate systems can be a great way to mitigate double-entry issues, but it doesn’t hold a candle to a good ol’ native integration.

Zoho Books solves the problems of tracking payments and integrating them with your data hub in one fell swoop.  Its easy-to-understand interface makes it simple to create links that prospective clients can use to fund their projects, and its native integration with Zoho CRM means you can see exactly what projects those clients have paid for by looking up their records in the system.

[caption id="attachment_2377" align="alignright" width="300"]zoho crm project based buisness Don’t let this happen to you. Resist![/caption]

Is it really worth holding onto your spreadsheets?

Some things are hard to let go of.  Expend enough mental energy on an idea or spend enough time doing something a particular way and it seems nearly impossible to imagine it any other way.  But, what once was the best way to do something can become outdated quickly; sometimes it’s difficult to even notice these changes happening if you aren’t looking for them in particular (and, when running a business, it can be doubly hard to spend free time researching software upgrades and the like).

That’s why we’re acting as your eyes.

Get started today!

Zoho CRM really is a fantastic option for project-based businesses: just ask a representative at this project-based business.  And, while you’re at it, ask us to show you a walkthrough of Zoho CRM; we’re happy to show you how all of it looks.  And, if it looks like a good fit, we can offer you training and implementation services.  Even ERP integrations are available too – just let us know what you use and we’ll work with you to figure out a way to plug it in.

Migrating from Salesforce to Zoho: 3 Essential Tips

zoho crm salesforce data migration

Lately, we’ve been getting a good number of questions about moving from Salesforce to Zoho CRM: namely, questions about migrating data between the two platforms.

I’m talking about things like:

  1. Does it all transfer from system to system the right way, or do things get lost in translation?
  2. Does it take a long time to do?
  3. Is it expensive?

First things first: it’s absolutely feasible to migrate data from Salesforce to Zoho, and to get your whole team on the platform.  But, the three concerns listed above are clearly important to address, and far be it from me to leave you hanging.

#1. What actually comes over in a data migration?

zoho crm salesforce data migration

Something that can really hamper you when migrating data is when information simply will not transfer from one system to another – that is, things get lost in translation.  At best, this leads to loads of manual entry after the big move; at worst, you’ll permanently lose valuable information about your clients and the overall health and history of your business.

This factor alone can sometimes keep people on a CRM that no longer suits them – and, in the case of staying on Salesforce, this can mean keeping a system that’s too complicated and has low user adoption, a system that’s too expensive to be a wise choice for your business.

Thankfully, there’s one important point to consider: Zoho CRM’s data import tool is able to read the metadata of records exported from Salesforce.  That means you’re able to keep all your notes and other auxiliary data attached to individual records, and that you don’t lose a bit of your past history.  (It’s important not to use the API data migration tool if you want to keep your metadata.)

#2. How long does it take to go from Salesforce to Zoho?

zoho salesforce data migration

It goes without saying that time is of the essence in the business world.  Projects taking too long – even data migration or CRM platform migration projects – can be relegated to the back burner if the project manager knows they will take too long for the company to carry out and not be totally messed up for days on end.  Sometimes, these projects are simply never completed, and the business isn’t able to move on from a system that’s outlived its usefulness – even if it’s something robust like Salesforce.

Zoho Corporation offers a data migration service of their own but with one caveat: it can take up to several weeks to complete.  Even for the price point ($100), not many companies can afford to be in limbo between systems for that long – and, for those in a hurry, it won’t do at all.

Fortunately, Zoho CRM’s built-in tool for migrating data helps immensely with this with its ultra-quick migration time.  Even for many modules and thousands of records, as long as your Zoho consultant knows how to map your fields correctly, data migration only takes two days at most.  That means that portion of the project can be completed over a regular weekend.

#3. What will a Salesforce to Zoho migration cost?

zoho crm salesforce data migration

Cost is yet another factor that can put a data migration project on hold if it’s too much to bear; it’s unfortunate that halting a simple data migration project could ever come down to cost, but it does indeed happen.  ZBrains’s team of consultants can spend a weekend, or even two solid weeknights, with your data to make sure it all flows from Salesforce to Zoho, but in return the service costs more than a flat $100 fee.  (Let us know if you’d like a quote based on the number of modules you need to work with.)

If price is still an object, you might even choose to use a Zoho training session to get familiar with the ins and outs of data migration from Salesforce to Zoho CRM yourself at that point.

Still not sure how to approach migrating from Salesforce to Zoho?

If you still have questions about how this would work, don’t hesitate to contact us.  Salesforce can be quite overwrought for businesses, and we’re happy to take a look at your existing configuration and tell you what it would take to replicate your current system on Zoho – or, even improve upon it.  Contact us today and a certified Zoho consultant will get back to you within 24 hours.

How a Zoho CRM Expert Can Help Product-Based Businesses

zoho crm product based businessEnhance Product-Based Businesses with a Zoho CRM Expert

Some businesses’ entire MO revolves around selling products: either creating them or ordering them from a vendor, storing them in bins, collecting payments for them, packaging them up, shipping them out and delivering them… It can be a process with more than just a handful of moving parts.

For that reason, keeping tabs on all your different customers should be a thoroughly immersive experience – no stone left unturned, so at a moment’s notice you know exactly where a given customer is in your sales cycle and what your next move should be as a company.

Unfortunately, not every CRM is adequately built to accommodate the needs of product-based businesses – and, in fact, some of these businesses subsist without even using a CRM (although, unless they are quite small companies, they’re most likely slogging along).  What’s a business owner to do about things like:

  1. Forecasting sales by product?
  2. Understanding your customers’ sales history?
  3. Communicating with fulfillment partners or other third parties?

Fortunately, the answers are all in one place: namely, Zoho CRM.

Optimize Zoho CRM with an Expert for Product-Based Businesses

zoho crm product-based business

#1. Forecasting sales is a cinch

For product-based businesses, knowing how to forecast sales is absolutely paramount, as that information answers all sorts of questions on an executive’s mind:

  • How much of any particular product should I order?
  • How much upcoming labor should I schedule?  Should I hire a new employee?
  • How much capital should I invest in optimizing business systems?  Can I set any aside and expect to take a vacation?

Zoho understands that businesspeople need this information in order to function, so they make it available in a special module in the system, appropriately called Forecasts.  Using Forecasts, you can set a target revenue amount and track progress towards that goal.  You can compare your past statistics with your current ones and see how your company has grown, or ascertain which areas need improvement.

zoho crm product-based business

#2. See all of your customers’ sales history – and then some – from one spot

For product-based businesses, knowing a given customer’s sales history can let you know a wealth of information:

  1. What kinds of purchases the customer might make in the future
  2. Which related products to try to sell the customer
  3. Whether or not the customer needs to be re-engaged, or whether or not it’s even worth trying to do, if he hasn’t made a purchase in some time

To that end, Zoho’s default Accounts module view shows a number of related lists, like Potentials (all associated deals, open or closed), Sales Orders, and Invoices, which can give an idea of what the customer buys, how frequently, and – drilling down a little deeper – which contact at the company is more likely to make a purchase.

A basic view of a potential:

zoho cfrm product-based business

And, a detailed report showing all orders in key accounts:

zoho crm product-based business

Using detailed reports and even very basic record views in CRM can be instrumental in determining the overall health of your business.

#3. Communication Breakdowns are a Thing of the Past

zoho crm product-based business

One almost expected gap in some product-based businesses’ processes compared to the ideal comes when multiple parties are involved, in the form of directives falling between the cracks.  The likelihood of this kind of mistake happening increases with larger companies, and becomes even higher when third parties – that is, entities completely separate from your company that help with the sale – are involved.

The fallout from these communication lapses is evident:

  1. You lose potential revenue
  2. You may weaken relationships with current and potential customers, and even vendors
  3. And, your office morale might suffer from both of these

For those reasons, Zoho has made it particularly easy to solve communication problems in a number of creative ways:

  • Using workflow automation to send reminders to CSRs to follow up with potential customers to ensure they move along the sales cycle
  • If your CSRs are too busy to send emails themselves, using workflow automation to have the system send automated emails to potential clients to remind them of where they are in your sales process
  • Using ERP integration to pull data directly from your accounting system, fulfillment partner, or other third party into your CRM.

Speaking of ERP, what if your current one isn’t cutting it?

It’s not uncommon these days to hear from folks who not only want to use Zoho for their CRM; they want to use it for their ERP functions as well.  The issue there is not all of the standard Zoho apps are quite cut out for those sorts of activities, at least at an advanced level.  While native Zoho apps like Zoho Books and Zoho Inventory work well for some businesses, for others their limitations force companies to stay on ERP systems that they’d prefer not to stick with.

For problems like that, Zoho ERP works wonders.  Zoho ERP, built on Zoho Creator, helps bridge the gap between native Zoho apps and business expectations.  As Creator is extremely flexible, nearly anything can be done as long as the proper coding is in place.  And, the team of developers at ZBrains in particular have taken on this challenge many times before.  We’ve even created an entire suite built on Zoho Creator called FieldTech.

How a Zoho CRM Expert Can Help Product-Based Businesses Meet Their Match with Zoho CRM

With Zoho’s solutions to these common issues faced by product-based businesses, they clearly understand how to cater to you.  Please contact us if you have any questions about Zoho’s capabilities, or how it can help you with your specific kind of business.

DIY Zoho QuickBooks Online Setup & Documentation

Thank you for signing up for our DIY Zoho QuickBooks Online integration

diy zoho quickbooks

The purpose of this application is to sync information in Zoho CRM to QuickBooks Online, or vice-versa.  Some information can be synced only one way at a time, and some can be synced both ways, depending on your preference.  The information you can sync is grabbed from different fields in either QuickBooks or Zoho.

The integration is designed only to sync new and updated records across platforms, not all records, although if you use an annual payment plan (for premium versions of the integration), you’ll be able to sync any records across platforms based on dates as far back as you’d like.  Please see section 4: Settings for more on data migration.

The first thing you’ll want to do is log into the application using the URL here.  You may want to bookmark it for your convenience.  The login page will require the credentials you created on the intake form.  If you aren’t sure what the intake form is and you don’t have login credentials, you’ll want to read this page on completing the QBO integration intake form before continuing.

Please see the following table of contents for instructions on how to use each aspect of the integration dashboard and the integration itself.

Table of Contents

  1. QuickBooks Mapping
  2. Logs
  3. Filters
  4. Settings
  5. Other Options
  6. Using the Integration
  7. A Few Provisos
  8. FAQ

Before you start using the application, this is a tour of all the modules on the left-hand navigation bar.

1. QuickBooks Mapping

This is the default or home page you’ll see upon logging into the ZBrains dashboard.  This screen allows for the mapping of different QuickBooks fields (on the left-hand side, marked by QB icons) with corresponding Zoho fields (on the right, marked with Zoho icons).  Standard QuickBooks fields will be marked with green QB icons while custom QuickBook fields will be marked with similar red icons.  Zoho fields will be marked with a regular Zoho icon regardless of whether the fields you choose are standard or custom.

The mapping works by selecting a Zoho field to map to each of the listed QuickBooks fields.  By default, for all available modules, the integration will map some of the QuickBooks fields to Zoho fields.  These mappings may not be to your liking, so please confirm they are correct before continuing.

To map a QuickBooks field to an unoccupied Zoho field: Click on the text field beside the field you’d like to map.  A dropdown menu will appear, from which you can select any field you’d like.  You can also type the name of the field you’d like if you already know its name, and the dashboard’s autocomplete feature will leave only field names that contain a match for the string you’ve typed.  When you see the name of the Zoho field you’d like to map to the corresponding QuickBooks field, select that field by clicking it.  Click “Submit” to save any changes.

If a field is occupied and you’d like to delete the mapping: Click the small X to the left of the field name or to the left of the field itself, then repeat the mapping process for an unoccupied field outlined above.

The following buttons are available in every module, regardless of the version you use:

  • Sync Mappable Fields button: This will grab all usable fields both from QuickBooks and from Zoho.  This is useful when you’ve just added a custom field to either QuickBooks or Zoho and you’d like to map it.  This also works if you simply don’t see a field in either QuickBooks or Zoho that you know already exists.
  • Reset Default Mapping button: If you don’t like how you’ve mapped the fields in your dashboard and you feel it would take too long to simply change them all back, you can use this button to return the mapped fields to how they looked when you first signed up for the integration.  Some fields will already be mapped.
  • Reset button:  This button is at the bottom of the screen.  Use this to clear any changes you’ve made before hitting Submit.  If you’ve already clicked Submit and changed your mapping details, you’ll have to manually make the changes you want and then click Submit again.
  • Submit button: This button, also at the bottom of the screen, saves any changes you’ve made on your mapping screen.

Also available is the Static Field checkbox beside every mappable field.  Checking this box will delete the Zoho field mapping option from the associated QuickBooks field and allow for hard-coding a value into the QuickBooks field instead.  Naturally, this means you can only assign a hard value to a QuickBooks field, not a Zoho field, so this feature is useful for Zoho-to-QuickBooks syncs.  Possible use case: If every customer tracked in QuickBooks Online is on the same payment terms, you may choose to mark all payment terms a certain way for customers synced from Zoho to QuickBooks, e.g., “Net 30.”

2. Logs

You’ll be able to track which records the integration has interacted with by examining the Logs page.  Different log screens are available for each available module, although the screen will default to Accounts if you don’t select an individual module page from the drop-down menu that appears after clicking.

When the integration interacts with a record, regardless of whether or not that record has been synced, the record will appear in the log.  Newer synced records appear at the top of the log while older synced records are pushed to the bottom.

Following is an explanation of the items in the log table itself:

  • Module Key: The number that appears here corresponds to a record in Zoho CRM.  You can view details for this record by clicking the blue Info button to the right of the record.
    • To view the corresponding record directly in the CRM, highlight and copy (CTRL+C) the number displayed under the Module Key heading, navigate to Zoho CRM, find the appropriate module, and view any available record in the module.  At the end of the URL for that record will be a long string of numbers, similar to the module key displayed in the sync log.  Delete the number currently at the end of the URL and replace it by pasting (CTRL+V) the module key number you’ve just copied.  Press enter and your browser will navigate to that record.  This functionality serves to give the user a direct view of the record in case any changes to the record are necessary.
  • Status: This tells whether or not a record was synced by the system.  Possible options here are Synced, Error, Not Synced, or Not ValidSynced means the record was synced across platforms.  Both Error and Not Synced mean the record was not synced because of an error.  Not Valid means the record was not synced because of user-defined filters.  Filters are further explained in section 3.
  • Error Message: This column displays the message associated with a sync error, if applicable.  Errors are usually related to a problem with Zoho CRM accepting the info, not with QuickBooks.  If you ever come across an error you do not understand, we offer support for any premium plan (that is, any plan that is not Freemium).  Please contact us if you need help.
  • Last Sync Date: This shows the date and timestamp of each record in the sync log.  You can use this to determine whether or not your integration is syncing by comparing the last sync date to the current date and time.
  • Details: This column shows a blue Info button for each record synced.  Clicking this button will open a new screen within your browser window that shows all fields the integration has come in contact with.  This is useful for giving an at-a-glance look at the record in question; alternatively, you can examine the record exactly as it appears in Zoho by using the record’s module key.  (Please see the bulleted instruction with the Module Key item above.)

3. Filters

By default, the integration will sync any new or modified records across platforms depending on the sync direction you select.  If you do not want all new or modified records to sync, you can choose to set criteria the integration will apply to all records it attempts to sync.  Clicking the Filters module on the left-hand navigation bar will bring you to the Accounts filtering screen, but you can set filters for any available module.

  • The default filter screen will be for records synced from Zoho to QuickBooks, but you can set the same (or a different) filter for records synced from QuickBooks to Zoho if necessary.  You can access the different sync directions with the drop-down menu in the upper right portion of the screen.

Here are the main options available to you in the Filter module:

  • Select Field: This drop-down menu displays a list of fields available inside the corresponding module in Zoho CRM or QuickBooks, depending on which module’s page you access.  Selecting a field here tells the integration which field the filter will act upon.
  • Select Condition: This menu displays a list of basic conditions to apply to the field chosen in Select Field.
  • Value: This is a text field you can use to type any information you want the integration to act upon based on your selected field and condition.  If your selected condition doesn’t require a value (e.g., “is not empty” or “is empty”), you should leave the Value field blank.

Use the blue plus symbol (+) to add another record filter in a given module and sync direction.

Use the green Submit button to save and apply any filter you have set.  Click the red Reset button to clear any unsaved filter.  And, use the dark blue Remove All Filters button to remove all filters you have set for the current module and sync direction.

4. Settings

The settings menu is comprised of a few tabs.  Their uses and purposes are enumerated here:

Zoho Authtoken: This field contains the Zoho authentication token used when you filled out the integration intake form.  The authentication token allows the integration to connect to your Zoho CRM instance, so if you remove it the integration will not work.  If you need to switch authentication tokens for any reason, please replace a deleted token with a new one as quickly as possible to avoid any sync interruptions.

Sync Direction: This tab lists the available module pairs to sync, according to which version of the integration you’re using.  You can use the drop-down menu to the right of each module pair to select whether you’d like to sync records in those modules from Zoho to QuickBooks, from QuickBooks to Zoho, both ways (Bi-Directional), or not at all (Disable).

  • Please note: Selecting “Disable” for any module pair will make the field mapping section for that module invisible, so you won’t be able to make any changes until the sync is re-enabled.  As well, we do not advise disabling the sync for essential (Accounts/Customers or Products/Items) modules unless you are working with the Freemium version of the integration, as failure to sync those properly can potentially cause syncing of transactional records to fail.

Sync Historical Data [Annual customers only]: This tab lists the available modules from which to sync old records.  In this case, an old record is anything created before the integration was implemented, as the integration is designed only to sync new or modified records; in cases where many records are present in one system and manually updating them all in order to trigger the integration’s sync would prove too time consuming, migrating historical data makes sense.

  • The Module Names heading lists the modules available to sync data from.  Sync Date allows for choosing a historical date from which to sync data.  The date can be modified across modules.  Use the check boxes to the right of each module to confirm you wish to migrate data from that module across platforms, and click the Submit button to begin.  The Reset button is not used.
    • Please note: The sync directions for the Sync Historical Data tab are controlled by the sync directions set in the Sync Direction tab.  If the proper module names do not appear on this screen (e.g., you see Customers, a QuickBooks module, instead of Accounts, a Zoho module), please change your preferred sync directions on the Sync Direction tab and the modules displayed will change accordingly on the Sync Historical Data tab.

Once your historical data migration tab is activated, you may use the function as often as you’d like.

5. Other Options

Clicking your username in the upper right corner of the screen reveals several other options:

Change Plan: This displays your current integration plan juxtaposed with other available plans.  You may upgrade or downgrade from one plan to another at any time without any lapse in functionality.  When any plan is upgraded or downgraded, you will receive two emails: One confirming the cancellation of your current plan, and another confirming the beginning of a new service subscription.  All upgraded or downgraded plans will come with new 15-day free trials, except for Freemium, which is always free to use.  Please note: Your monthly service fee will not be prorated when your new subscription begins.

  1. If you choose to upgrade to a paid plan from a Freemium plan, you will be prompted to enter your payment information.  Once the system accepts this information, you will arrive back at the “Upgrade Plan” page and will have the option to map fields in new or different transactional modules by clicking the QuickBooks Mapping module in the navigation bar.
  2. If you upgrade from one paid plan to another paid plan, or if you downgrade your plan, you will not be prompted to re-enter payment information.

QuickBooks Online: This is a general settings area for establishing the connection between the integration and your QuickBooks Online system.  In most cases, you will not need to access the screen again after establishing the connection for the first time.  The screen lists three steps to configuring the integration:

  1. Authenticate:  This step is completed in the initial intake form after you click the light blue Authenticate QBO button in Step 2 of the intake form.  The background area of this step should be filled in with dark green, indicating the step has been completed.  You do not need to do anything else with this step.
  2. Verify: This is an extra step to ensure the connection between QuickBooks Online and our integration platform.  If the background area of this step is not filled in with dark green as in the Authenticate step, please click Verify and follow the prompts you receive.  Once this step is complete, the background area will turn green as it does with Authenticate.
  3. Activate: After completing steps 1 and 2, the integration still will not function until you toggle the switch from “Inactive” to “Active.”  The “Inactive” toggle will show a switch with a grey background, while the “Active” toggle will show a switch with a dark green background, similar to that used in steps 1 and 2.  You can use this “Inactive” toggle to quickly turn the entire integration off, and the “Active” switch to turn it back on again.

Help: This link leads to the ZBrains help desk.  Use this link to submit a ticket if you have a general question about setup, or you experience an error that is not covered in this document.

Logout: Clicking this link will log you out of the integration environment.  The system will automatically log users out after 10 minutes of inactivity, so we advise you to either keep your password handy or have your browser save it for you.

6. Using the Integration

After familiarizing yourself with the various components of the integration dashboard, you should run a sync with some test records to confirm the functionality of the integration.  To do this, please follow these steps:

  1. Re-confirm your field mappings (see section 1) and your sync direction.
  2. Open your platform of origin, either QuickBooks Online or Zoho CRM, and create a test Customer (in QuickBooks) or Account (in Zoho), making sure to include data in mapped fields.  The sync will run automatically every 10-15 minutes, so please wait and confirm your test record has appeared in the destination platform after enough time has passed.  Use the Logs module in your navigation bar to check on synced records.
    • Please note: Users are unable to modify the sync interval currently, but this feature will probably be included in the next release.
  3. Open your platform of origin again, and create a test Item (in QuickBooks Online) or Product (in Zoho CRM), making sure to include data in mapped fields.  Again, wait until enough time has passed for the sync to occur.  Use your Logs module to check on synced records.
    • Please note: Once you have confirmed your Products or Items sync correctly, you may create a test transactional record as your service plan allows, but please ensure products or items used as transactional line items are synced to both systems before using them in transactional records.  If these line items are not synced across platforms before creating a transactional record to sync, the transactional record you create will not sync.

Once you have confirmed the integration functions to your liking, there’s nothing else to do: the integration will continue to run at 10-15 minute intervals, syncing any records you input across platforms as you specify in your sync direction settings.

7. A Few Provisos

There are some things you should know about the integration that aren’t obvious from the onset:

  1. The integration creates hidden custom fields in QuickBooks. When you implement this integration, all QuickBooks Customer and Item records will gain a new custom field called ZOHOMODULEIDCUSTOMER and ZOHOMODULEIDPRODUCT, respectively.  These will be filled with values the integration uses to track sync states, and they are not mappable in the interface.  For that reason, please do not modify the values in these custom fields, as doing so will cause certain records not to sync.
  2. The integration only works with “Inventory” items in QuickBooks.  Whenever you sync items from Zoho CRM to QuickBooks Online, they will arrive in your system as inventory items (as opposed to other types).  Conversely, only inventory items (as opposed to other types) are allowed to sync from QuickBooks Online to Zoho CRM; other types of items will not sync.  For this reason, we advise you not to change inventory item types manually after they sync to your QuickBooks Online, as they will not be updated back to Zoho CRM and, as a consequence, could cause certain other transactional records not to sync.
  3. For bi-directional syncs, if a given record is modified in both Zoho CRM and QuickBooks Online between syncs, the record in QuickBooks Online will take precedence.  In these cases, changes made to the records in Zoho CRM in this manner will be lost.  We advise against modifying a given record in two different systems as a rule for this reason.
  4. QuickBooks requires some Item fields; Zoho does not require the same information in Products.  QuickBooks requires items to be mapped to expense accounts, income accounts, and asset accounts; Zoho CRM does not store this information, though.  For this reason, you do not need to have these fields filled in Inventory Settings if you only plan to sync from QuickBooks to Zoho, but you will need to ensure they are correctly mapped if syncing from Zoho CRM to QuickBooks.
  5. All Accounts/Customers and Products/Items should be synced across platforms before syncing non-test transactional records.  This is because introducing a new Zoho account or QuickBooks customer – or Zoho product or QuickBooks item – at the same time as a new transactional record like an invoice, sales order, or quote/estimate, will cause the integration to fail.  You may choose to keep accounts/customers and products/items inconsistent expressly to test the functionality of a transactional sync – for example, an invoice – by creating a test QuickBooks customer, test item, and then a test invoice containing that item and associated with that customer, but this practice is not advisable beyond testing.  Please note: Data Migrations are required for all Integration projects and pricing varies on complexity of the integration itself. Typically, data migrations are priced based on the number of modules (ex.  Sales Orders, Invoices, Customers are examples of modules) along with the number of records. Schedule an integration assessment today with a ZBrains consultant to get a project quote. Use the Connect with Us button at the end of this article. 
  6. Deleting a given record previously synced across platforms will cause the sync to fail if the non-deleted record is modified and needs to sync again.  This is related to point 1, as the integration will search for a matching ID field that corresponds to a record already created, as the field does not exist for new records.  When the integration does not find a matching ID field, the record will not sync.  For this reason, we advise against deleting any records that have been touched by the integration unless you either plan to delete the corresponding record from the other platform or do not plan to modify the non-deleted record any further.

8. Frequently Asked Questions

Thankfully (or perhaps not), some issues with the integration are more common than others:

  1. Why aren’t any of my fields appearing in the QuickBooks Mapping module when I log in for the first time?
    • Sometimes, the integration needs a little positive reinforcement.  If no mappable fields appear, first click “Reset Default Mapping.”  If this does not cause your fields to appear, click “Sync All Mappable Fields.”  If neither of these options work, please open a ticket with us here.
  2. I just followed your instructions, but only some of my QuickBooks fields are appearing.  What gives?
    • The integration grabs fields from QuickBooks by looking at the fields that are being used by other records in your system.  If you’re looking to map a field in QuickBooks that you’ve never used before, try creating a test record that utilizes those fields you don’t see yet, then click “Sync All Mappable Fields.”  If this doesn’t solve the problem, please let us know about it.
  3. I logged in for the first time and my Customers/Accounts fields appear, but none of my Products/Items are there.  What happened?
    • Are you on the free version of Zoho CRM?  That one doesn’t have a Products module in it, so you won’t see any inventory fields that way.  To solve that problem, please upgrade to a free trial of at least Professional edition and refresh your integration dashboard.
  4. Upon setup, I got a red error flag saying “At least one inventory item must be present.”  What do I do?
    • This is somewhat related to question 2 above.  To solve this problem, please create a test inventory item and return to your QuickBooks Mapping module, select Products, and click “Reset Default Mapping,” then “Sync All Mappable Fields” if no fields appear.  If you still see the red error flag, open a ticket with us.
  5. What does Static Field mean in my QuickBooks Mapping module?  How do I use it?
    • The Static Field option is used to assign a hard value to any QuickBooks field, but not to sync that value anywhere in Zoho.  For more details on this feature, see the bottom of section 1: Mapping.
  6. I got a big red error flag saying my QuickBooks Online credentials are no longer valid so the integration won’t work.  How do I get it to work again?
    • This means someone (maybe even you) must have changed your QuickBooks Online credentials without realizing that would affect the integration.  Don’t worry; it happens to the best of us.  To re-authenticate the integration, go through the QuickBooks Online steps in section 6: Other Options.
  7. Some of my records are merged – or, they’ve been deleted!  Did the integration do it?
    • It wasn’t us!  The QuickBooks Online API doesn’t allow for merging records or deleting them automatically, so we couldn’t have even done it if we tried.  If you’re running plugins other than the Zoho CRM & QuickBooks Online integration, one of those may the culprit, as the issue may have to do with a program other than QuickBooks or Zoho.

Thank you again for using the QuickBooks Online integration with Zoho CRM.  Please let us know if you have any questions or experience any issues this guide does not cover by calling (888) 207-4111 or using this link to our help center.


Connect with Us


Increase Zoho CRM Adoption – Use Tooltips

Zoho CRM Tooltips: the three-in-one helper that’s brand new to the CRM

If you’ve ever had to force an entire team to start using a new piece of business software, you know what a pain it can be.

zoho crm tooltips

Not only can your team not read your mind (so they just don’t know how awesome the new system is or how many hours you put into overseeing its development), but training isn’t always engaging for everyone, and sometimes people are left with questions about what to do with the array of new data entry options before them.  Not the best way to success.

zoho crm tooltips

In this breakneck-paced business world, there isn’t always time to ask questions to peers about using your new system properly, let alone flag down your supervisor for a best practices tutorial.  So, people are forced to adapt.  And, they do so – but, not always in the best way, as you find out when you run a report in your system and all the numbers are off.  You might ignore this the first time this happens, but as soon as you see it again, you know something’s amiss; you realize you can’t accurately gauge the health of your company because your staff aren’t using the new system correctly.

So, what’s a business owner to do to make sure the team stays the course and doesn’t break off into a bunch of factions using the new system improperly?

Well…there is something you can do – and, in retrospect it seems like such an obvious feature, I’m really glad Zoho Corp chose to implement it in the new Zoho CRM UI.

Introducing Zoho CRM Tooltips

zoho crm tooltips

Zoho has introduced a tooltips feature in the CRM for custom fields.  The idea here is that standard fields are all going to be pretty self-explanatory, but nonstandard or custom fields might be a little harder for your staff to grasp the meaning of, especially if you just added them yesterday and didn’t tell anyone.

Zoho CRM tooltips places a handy question mark bubble next to custom fields of your choice (the tooltips can be enabled or disabled in CRM custom fields) and allows an explanation of the custom field in question to be set.

This does a few different things for you:

  1. Reminds your team of the proper way to use your custom fields
  2. Ensures more accurate data entry for better employee record-keeping
  3. Allows for more accurate, more complete reports for executives

Of course, providing help to your team in the form of a little question-marked bubble is great, but the real end result – better insight into the health of your business – is unbeatable.  Zoho CRM tooltips is just one more reason to use the new version of CRM if you haven’t begun to already.

Psst! Need a Zoho CRM tutorial for tooltips and other Zoho best practices?

zojo crm tooltips

Zoho realizes what an issue proper system adoption can be, and to that end they’ve released a couple of gamification features: essentially, they turn using the system into a game, with points, badges, a leaderboard, and – as your game director sees fit – the possibility to win prizes.  Gamification in the form of Gamescope is a component of the new Zoho CRM and Zoho Projects; Zoho also uses the leaderboard concept and applies it to sales in general in the Zoho Motivator app.


Zoho Salesinbox Prioritizes Email

Too many emails?  Use Zoho SalesInbox to sort and prioritize them

Lately, I’ve been wanting to delve into the new Zoho CRM a little more deeply.  On the surface, the new CRM looks wonderful with its new facelift, but beneath the surface (or, with just a few mouse clicks), one can see that Zoho did much more with the new CRM than simply alter its appearance.  Next on the list of new features I really like is Zoho SalesInbox, a variation of the Zoho CRM email integration.

[caption id="attachment_2165" align="alignright" width="300"]zoho salesinbox You don’t want this.[/caption]

Zoho SalesInbox tackles a common problem with most businesspeople, especially executives: their email inboxes are filled to the brim with all manner of messages, some of them relevant, some of them very pressing, and others completely impertinent.  Having to sort through them may not take that much time, but, spend enough mental energy doing even menial tasks and you’ll soon find yourself depleted.

SalesInbox takes away a little bit of that menial thought labor by automatically sorting your emails into groups: Emails from contacts related to Deals, emails from other Leads and Contacts, emails from people not in your CRM, and emails from colleagues.

zoho salesinbox

Again, it’s only a slight reduction in work, but you’ll quickly get into the habit of scanning your screen from left to right, just like a line of text – and, you won’t be nearly as fatigued with the tedium of sifting through new messages.

Salesinbox provides cool new features to help you sort

zoho salesinbox

  1. Flag certain contacts to automatically put mail from them into a column of your choice.
  2. Flag emails from Contacts related to Deals of your choosing (for example, Deals with an amount over $10,000) so they appear in your inbox first.
  3. See how contacts have progressed through your sales funnel with at-a-glance details.

And, perhaps the best (and most obvious) feature of having a Zoho CRM email integration…

4. Automatic lead creation with the click of a button – or, with a workflow rule.

This is great if, for example, you’ve made a post in an outside forum or any other place you can’t easily insert a Zoho webform: Let clients know to email you using a certain word in the email subject line, like “quote.”  The system will create a new lead any time someone not already in your CRM uses the word “quote” in the email subject line.

Just on its own, this feature of the Zoho CRM email integration is fantastic: it effectively ends manual entry if you can tell the system your requirements for becoming a Lead.  Just imagine how much time you’d get back in your day!

Speaking of workflow rules, you can have the system remind you to work on those bigger deals when they email you.

[caption id="attachment_2168" align="alignright" width="300"]zoho salesinbox Okay, maybe overselling it, but I’ll bet this comes in the next build.[/caption]

This feature is the next-best thing to having a personal assistant: if someone you deem important emails you and you haven’t replied in a time frame you specify, the system can remind you to email those people back.

As well, you can program the system to let you know when someone else hasn’t replied to you in a while.  Maybe you’ve had a client fall through the cracks because you simply didn’t follow up as zealously as you could have… Well, that doesn’t even have to be a factor anymore.

There’s even more to Zoho SalesInbox that I haven’t covered here, so for a full breakdown I suggest taking a look at Zoho’s own article on the subject.


Zoho Trial

Get a Zoho Tuneup

Crexendo

Crexendo